How Far Apart Should LED Shop Lights Be?
Start LED shop light spacing at about 4–6 ft between fixture centers. Adjust the layout for ceiling height, beam spread, output, and shadows across your work areas.
On this page (8 sections)
- What LED shop light spacing should you start with?
- How does ceiling height change light spacing?
- How should you lay out rows around doors and storage?
- Should spacing change over a workbench?
- How do output and beam spread affect fixture choice?
- How should you set up, check, and care for the lights?
- What spacing mistakes should you avoid?
- Which LED shop light spacing and fixture should you choose?
Start LED shop light spacing at about 4–6 ft between fixture centers, then adjust for mounting height, beam spread, and the work below. Use that range to sketch a layout, not as a promise that every fixture will cover the same area.
A useful layout lights the floor, benches, and storage without forcing you to work in your own shadow. Plan those areas before buying a pack of fixtures or drilling mounting holes.
What LED shop light spacing should you start with?
Use 4–6 ft center to center as an initial grid for a typical garage or workshop. Check the gaps along each row and between neighboring rows.
With a 4 ft fixture, a 6 ft center-to-center gap leaves about 2 ft between its ends when the lights run end to end. Measuring 6 ft between fixture ends would create a much larger gap.
Keep the outer rows close enough to light wall storage and room edges. About half your row spacing is a useful starting offset from a wall, with adjustments for cabinets and benches.
Sketch your LED shop light spacing before mounting
Draw the room to scale and mark doors, overhead tracks, shelves, and work surfaces. Add proposed fixture centers, then measure the gaps rather than judging them by eye.
For example, two parallel rows in a 12 ft-wide room could sit 3 ft from each side wall, leaving 6 ft between rows. This is a starting sketch, not a fixture-count recommendation.
If you're also choosing fixtures, our guide to how to choose LED shop lights for a garage explains output, color, and mounting choices.
How does ceiling height change light spacing?
Higher fixtures spread light farther but deliver less light to a given work area, so a taller ceiling may require more output or additional fixtures. Raising lights doesn't automatically justify wider gaps.
Think about the distance from the fixture to the surface you need to see. A raised workbench sits closer to ceiling lights than the floor does, while shelves can block either surface.
At low mounting heights, fixtures may create separate bright patches unless their beams overlap. Bringing rows closer can smooth those patches, but check glare from your normal working position too.
For a dim room with fairly even coverage, review how many lumens you need in a garage. If only certain areas are dark, adjust placement before increasing output everywhere.
How should you lay out rows around doors and storage?
Use parallel rows that serve the room's main activity areas, then adjust around objects that block light. A neat ceiling grid helps only if useful light reaches the space below.
In a two-car garage, a row near each parking bay can be a starting point. Place lights so they also reach walking lanes and the sides of parked vehicles.
Check the layout with the garage door both open and closed. A fixture above the raised door may contribute little while you're working with the door open.
Tall shelves need attention too. A light behind a storage rack won't reach the aisle well, so move the row toward the aisle rather than adding another fixture behind the same obstruction.
Use how many shop lights you need to turn the sketch into a fixture count. Our guide to how to hang LED shop lights covers the mounting step.
Should spacing change over a workbench?
Give a workbench direct light over the work, with another light direction if your hands or tools create deep shadows. General ceiling coverage and bench lighting solve different problems.
Stand where you'll normally work before choosing the final position. A fixture behind your shoulders can leave the project shaded even when the rest of the room looks bright.
Under a deep shelf, use a suitable task light beneath the shelf. Moving ceiling fixtures closer together won't send light through a solid obstruction.
Sunco: choose it for several short lighting rows
The Sunco 4FT Plug-In Linkable LED Shop Lights 10-Pack suits a garage with several bays or benches that need separate groups. Its frosted covers diffuse light, and the included hardware supports direct mounting or suspension with hanging chains.
Connect up to 4 fixtures in one linked group. With 10 fixtures, plan multiple groups and suitable outlet access rather than treating the whole pack as one continuous run.
Skip this pack if you need only a few fixtures or want a single linked row longer than that limit. Sketching separate groups first helps avoid awkward cord routes across the ceiling.
How do output and beam spread affect fixture choice?
Choose output for the amount of light you need and beam spread for where it goes. A brighter fixture can support wider gaps only when neighboring beams still cover the work area evenly.
A wide beam can send light toward walls as well as downward. Room surfaces, fixture orientation, and shelving all affect how much of that light reaches your tools.
A frosted cover spreads the visible light source and can make it easier to look toward. It doesn't remove shadows caused by a cabinet or replace good fixture placement.
Barrina T8: choose it for broad indoor coverage
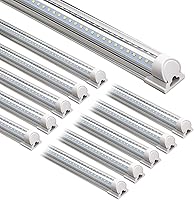
The Barrina 4FT T8 LED Shop Lights 10-Pack suits an open garage or workshop where you want broad coverage across several rows. Each fixture produces 5,500 lumens, with a 270-degree beam angle.
You can connect up to 6 fixtures in a series using the 48-inch connecting cables. It supports either a switched power cord or hardwiring, which gives you options when planning how each row receives power.
Skip the 10-pack for a small area needing only a few lights. If diffused light near your line of sight matters most, consider one of the frosted-cover options instead.
Barrina BS42a: choose it for a smaller bench zone
The Barrina BS42a 4FT LED Shop Lights 4-Pack suits a workbench zone or smaller room where a 10-pack would be excessive. Each fixture provides 4,800 lumens, and its frosted cover diffuses the light.
The fixtures support hanging or direct ceiling mounting, with wiring concealed at the back of the housing. They can link up to 10 lights, allowing you to expand beyond the initial pack.
Skip this option if you need enough fixtures for several long rows immediately. Also map outlet positions against the 59-inch power cord before settling on mounting points.
How should you set up, check, and care for the lights?
Confirm coverage before committing to every mounting point, then keep fixtures and cords secure. Follow the fixture instructions for mounting, connections, and permitted linking arrangements.
Use this sequence:
- Mark positions. Include fixture centers, power sources, and the path of each connecting cable.
- Check clearances. Keep lights and cords clear of garage-door tracks, moving doors, and stored items.
- Secure a small group. Use the required mounting hardware before powering it, then judge coverage from normal working positions.
- Adjust the layout. Shift rows or add a task light where shadows remain before installing the rest.
Don't pull a connector cable tight to reach the next fixture. Move the fixture or use a connection arrangement approved for that model.
Our guide to wiring and linking LED shop lights safely explains how to plan connections. Use a qualified electrician for hardwired work when needed.
For care, disconnect power and let fixtures cool before cleaning. Remove dust with a soft, dry cloth, follow the manufacturer's cleaning directions, and keep housing openings clear.
Recheck coverage after adding shelves or moving a bench. A layout that worked in an open room may leave new shadows once storage fills the walls.
What spacing mistakes should you avoid?
Avoid using fixture count as a substitute for placement. Several bright lights clustered in the middle can still leave wall benches and walking lanes dim.
- Measuring from fixture ends: use centers so your sketch matches the installed layout.
- Spacing around cable length alone: choose positions for coverage, then plan compatible connections.
- Installing every light before checking: review a securely mounted group first.
- Adding brightness to fix a blocked beam: move the light or add task lighting beyond the obstruction.
- Ignoring glare: check from the bench, doorway, and seated work positions before finalizing fixture height.
Don't use a phone's automatic camera exposure as your main judge of brightness. Look at the actual task, including small markings, fasteners, and shadows around your hands.
Which LED shop light spacing and fixture should you choose?
Choose Sunco for several shorter linked groups, Barrina T8 for broad coverage across an open room, or Barrina BS42a for a smaller zone with diffused light. Match the pack size and connection layout to your sketch before ordering.
For LED shop light spacing, keep the grid where coverage is even, tighten gaps where dark lanes remain, and add direct light where benches need it. The garage lighting guide can help you fit those rows into a complete room plan.
Frequently asked questions
How far apart should LED shop lights be?
Start with about 4–6 ft between fixture centers, then adjust for beam spread, mounting height, output, and obstacles; measure spacing across rows as well as along them. Before fixing every light in place, check for dark lanes on the floor and shadows across the workbench.
Should shop lights be in rows?
Parallel rows are a useful starting layout for a rectangular garage or workshop; keep the gaps fairly even, then shift fixtures to serve benches, parking bays, and storage areas. Check the layout with the garage door raised, because the door can block light that reaches the floor when closed.
Do brighter LED shop lights need more space between them?
Brighter fixtures can allow wider spacing when their beams still overlap well at the work surface; output alone isn't enough to set the gap, since narrow beams and tall storage can leave dark patches. Choose spacing for even coverage first, then check whether the total light suits your tasks.
Should I put a shop light directly over a workbench?
Yes, place a light over the workbench or slightly toward the work from where you stand; this helps keep your body from blocking the light reaching your hands. If shelves shade the bench, add light beneath them rather than relying on a ceiling fixture to reach through the obstruction.