Garage and Workshop Lighting: The Complete Guide
Good garage lighting combines even ceiling coverage with focused task light. Use shop lights across standard ceilings, high bays in tall open spaces and portable lights for close repairs.
On this page (9 sections)
- What types of garage lighting work best?
- How should you plan garage light placement?
- How bright should garage lighting be?
- Which garage lighting options fit different spaces?
- What should you check before installing garage lights?
- How can you reduce shadows and glare?
- How should you care for garage lights?
- Which garage lighting mistakes should you avoid?
- How do you choose the right garage lighting plan?
Good garage lighting combines even ceiling coverage with focused task light where you repair, build or inspect. Choose the fixture style for your ceiling and power supply, then position lights around the work instead of concentrating everything over the middle of the floor.
A garage used for parking needs clear walking routes and visible storage. A workshop also needs light on bench tops, tool faces and parts hidden beneath a hood or shelf.
Start with the room layout before choosing a pack of fixtures. For a room-specific estimate, see how many lumens you need in a garage.
What types of garage lighting work best?
Use shop lights for distributed ceiling coverage, high bays for tall open spaces and portable lights for movable tasks. A screw-in panel light suits a simple bulb replacement when the socket and surrounding space are suitable.
| Fixture type | Best fit | Main limitation | Check first |
|---|---|---|---|
| LED shop lights | Standard ceilings, long benches and separate work zones | Several fixtures need planned mounting and power routes | Length, linking limits and outlet positions |
| Screw-in panel lights | Improving light around an existing ceiling socket | Coverage remains tied to that socket location | Socket condition, load and panel clearance |
| High bay lights | Tall, open garages and workshops | Concentrated overhead output can feel harsh at low mounting heights | Mounting guidance, support and coverage |
| Portable work lights | Vehicle repairs, inspections and changing work positions | A focused beam cannot replace room lighting | Power source, aiming and stable placement |
For a typical garage with a standard ceiling, start by considering several shop lights. Their separate mounting positions let you put light beside a vehicle, over a bench and near storage.
Choose a socket-based fixture when installation simplicity matters and the existing socket is reasonably placed. It cannot move light around a wall or place a source beneath an overhead cabinet.
High bays need space for their beams to spread. Read high bay vs low bay lights if your ceiling height leaves you between fixture types.
Portable lights complete the plan by reaching places ceiling fixtures cannot. For more detail on the main ceiling option, see how to choose LED shop lights for a garage.
How should you plan garage light placement?
Place lights above or beside the surfaces you actually use, while keeping the garage door and stored items clear. A layout drawn around an empty floor can fail once a vehicle, shelving and your body block the light.
Measure the room and mark the workbench, parking bays, stairs, shelves, door tracks and opener. Include any equipment that stays in place, such as a drill press or tall cabinet.
Sketch both door positions. A fixture that works with the door closed may be hidden by the raised door when you work with it open.
Keep maintenance access in the plan, too. Avoid a mounting spot that will require moving a heavy storage rack every time you need to reach the fixture.
Plan garage lighting around parked vehicles
Put light along the areas beside the vehicle where you walk and work. A single fixture centered above the roof leaves the vehicle itself blocking light from reaching its sides.
For a two-bay garage, think in separate lanes rather than one broad rectangle. Each bay, the path between vehicles and the bench area may need light from a different position.
Account for an open hood or rear hatch if repairs are part of your routine. Ceiling light can handle the surrounding space while a movable task light reaches the shaded parts.
How many shop lights do you need for a garage?
Choose the fixture count from room area, useful output and the number of work zones. A long garage with shelves and separate benches may need more light positions than an open room of the same size.
Divide the floor plan into zones, then assign fixtures to those zones. This reveals whether you need a broad ceiling layout, a dedicated bench row or both.
A multipack gives you several mounting options, but you do not need to install every fixture. Buy around a layout rather than arranging lights simply because they came in the same box.
Our guide to how many shop lights you need for a garage explains how to turn room measurements into a fixture count.
How far apart should shop lights be?
Space fixtures so their useful light overlaps at the working surface. The relevant surface might be the floor, a bench top or the side of a parked vehicle.
Spread fixtures across the room instead of packing them into a bright central strip. Leave enough coverage near walls to see shelf labels and stored tools without standing directly beneath a light.
Keep spacing reasonably consistent within a row, then adjust for obstructions. A ceiling beam or tall cabinet can justify a separate fixture rather than a wider gap.
Use LED shop light spacing to refine the rows after choosing a fixture style.
How bright should garage lighting be?
Estimate brightness from the size of the area and the detail of the work, then check where the light will land. Total lumens help compare output, but placement determines how useful that output becomes.
Lumens measure the light a source emits. Illuminance measures how much reaches a surface, which is why mounting height, beam spread and obstructions matter.
For a rough planning calculation, multiply floor area in square feet by a chosen target in foot-candles. A 200 sq ft zone at 30 foot-candles calls for about 6,000 lumens reaching its surfaces.
That calculation is a starting estimate, not a fixture prescription. Some light hits walls or is blocked, so fixture output must allow for the room and layout.
Parking and storage usually need less concentrated light than reading small marks or assembling parts. Give close work its own task light instead of raising brightness across every part of the garage.
Dark walls, unfinished wood and crowded shelving reflect less light than pale, open surfaces. A space with those features may need more output or more light positions.
For a step-by-step estimate, use our garage lumen guide.
Compare useful light, power and pack totals
Compare lumens per fixture before comparing multipacks. A pack total can make a modest individual fixture sound much brighter than it is.
Watts describe electrical power, not brightness. Use them to plan electrical load and compare consumption after you have found fixtures that fit the layout.
A higher lumen-per-watt figure means more light output for the stated power. It does not describe glare, color quality or how evenly the fixture lights your bench.
Also check whether output figures refer to one light or the whole package. When that is unclear, resolve it before calculating fixture count.
Which garage light color temperature should you choose?
Choose 5000K for a daylight appearance, or 6500K if you prefer a cooler, bluer look. Color temperature changes the appearance of light, not the number of lumens.
Keep fixtures that illuminate the same work area reasonably close in color temperature. A cool ceiling light beside a much warmer bench light can make the surface look different as you move a part.
Color rendering is a separate concern. If you compare paint, stain or colored wires, consider how faithfully the light shows colors as well as its kelvin value.
For finish matching, check the material under the light where it will ultimately be used. A garage lamp alone should not decide how a painted item will look outdoors or inside the house.
See what color temperature is best for garage lighting for a closer comparison.
Which garage lighting options fit different spaces?
Choose these options by the job they solve, rather than treating them as interchangeable ceiling lights. They cover movable repair light, distributed shop lighting, tall-ceiling coverage and an existing screw-in socket.
DeWalt DCL043 for movable repair light
The DeWalt DCL043 20V MAX Spotlight suits repairs where the light needs to move with you. It provides up to 1,500 lumens, with 2 brightness settings and a head that pivots through 90 degrees.
Its base, integral hook and belt hook give you several placement choices. Use a stable position beside the work so both hands remain available, and aim the beam before handling parts.
The battery is not included. Choose this model when its cordless setup fits your equipment, and account for a compatible battery and charging arrangement before ordering.
The lower setting can be useful when a close surface reflects too much light. Moving the light farther away or aiming across the work can also make small parts easier to see.
Skip it as your main garage light. A spotlight is useful for an engine bay, dark corner or inspection point, but its focused output does not replace fixtures spread across the ceiling.
Keep the lens clear of dust and set the light where a tool, hose or closing panel cannot knock it over.
Hykolity shop lights for separate work zones
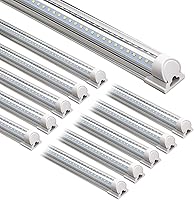
The Hykolity 4FT Linkable LED Shop Lights 10-Pack suits a garage with several areas to light. Each fixture produces 4,400 lumens using 42W, making the pack useful for planned rows and dedicated workbench coverage.
The lights can hang from the included chains or surface mount with the included screws. Each has a 59-inch power cord with an on/off push button on the cord.
You can connect up to 6 fixtures together. The full pack therefore needs more than one linked run, and each run needs a suitable power arrangement.
Choose these when you want control over where the light sources sit. A row beside a vehicle and a separate bench row can serve the room better than one high-output fixture in the center.
Skip the full pack for a small area needing only one light, unless you have a clear use for the remaining fixtures. Also check that the cord switches will remain reachable after mounting.
The open-frame design has no plastic cover over the light source. Position fixtures outside your normal line of sight, and disconnect power before cleaning exposed surfaces.
Hyperlite high bays for tall open garages
The Hyperlite 150W UFO High Bay suits a tall garage or open workshop that needs substantial overhead output. Each fixture produces 19,500 lumens and has a 6 ft cord with a 120V plug.
The pack includes 6 fixtures and ring hooks for mounting. The aluminum housing and PC cover form a compact fixture, but the support above it still needs to suit the installation.
Choose this option when the ceiling height and open floor plan give each beam room to spread. Plan coverage at bench height as well as floor level before deciding how many lights to use.
Skip it for a low ceiling close to your eyes or work surface. A smaller number of powerful overhead sources can leave awkward shadows around shelving and vehicle panels.
The complete pack represents 900W of lighting load before other equipment. Plan the circuit around that load plus tools, heaters and anything else sharing it.
A plug simplifies the power connection, but it does not remove the need for secure overhead mounting. Use Hyperlite's installation guidance to check the support, clearances and intended layout.
POLARPRA panel lights for an existing socket
The POLARPRA 32000LM Garage Ceiling Lights suit a garage with usable E26/E27 sockets where you want to replace bulbs without mounting separate shop lights. Each light has 6 adjustable outer panels that tilt up to 90 degrees.
The lights use 6500K illumination and are non-dimmable, without motion sensing. Choose them when you want a cool daylight appearance controlled through a compatible existing switch.
POLARPRA gives conflicting output figures of 16,000 and 32,000 lumens. Confirm the per-light output before using either number to size your layout.
Check that the socket, fixture and circuit can handle the stated 160W requirement per light. A screw-in base alone does not prove that an older lampholder or enclosed fixture is suitable.
Skip this style if the socket sits behind the raised garage door, beside a blocking beam or inside an enclosure with poor panel clearance. Adjustable panels cannot overcome a badly placed light source.
Start with the panels directed toward useful room areas, then adjust with power off as instructed. Do not force a panel beyond its travel or use it as a handle while tightening the base.
What should you check before installing garage lights?
Confirm mounting support, electrical capacity and cord routes before installation. Those checks decide whether a fixture fits the garage as it stands or needs electrical work first.
Read the instructions before drilling holes. Note the mounting method, operating conditions, clearances and limits on connected fixtures.
Match the mounting method to the ceiling
Secure fixtures to a support suited to their weight and mounting method. Ceiling material alone does not tell you whether a screw or anchor will hold safely.
Hanging lights need sound attachment points and clearance from door movement. Surface-mounted lights need enough room for their bodies, connectors and cords.
Keep the entire assembly out of the door's path, including chains and loose cable. Check the opener arm and moving hardware, not just the flat door panels.
Use a stable ladder on a clear floor. Follow how to hang LED shop lights for planning the mounting points and fixture height.
Plan power before connecting a row
Put plug-in fixtures within reach of suitable outlets without stretching cords. Route cables away from sharp edges, hot surfaces, pinch points and moving door parts.
Do not rely on extension cords as permanent wiring. If the available outlets force an awkward route, adding a properly placed outlet is a better plan.
Linking limits apply to each fixture system. A connector that physically fits does not mean mixed models or longer chains are permitted.
Add lighting wattage to the other loads on the circuit. Use a qualified electrician if the capacity or wiring arrangement is unclear, especially where power tools and heating equipment share the supply.
Before making connections, read how to wire and link LED shop lights safely.
Check the garage environment and controls
Choose lights approved for the conditions where they will operate. Condensation, cold, dust and occasional water exposure can matter even inside a garage.
Check the operating temperature range for an unheated space. Do not assume that every LED fixture is suitable for freezing weather or a location exposed to water.
Separate ceiling and bench controls can keep the garage useful without switching on every fixture. Motion controls can help with entry lighting, but stationary bench work needs settings that will not leave you in darkness.
Use dimmers only with compatible lights and controls. For hardwiring, damaged sockets or circuit changes, hire a qualified electrician and follow local electrical rules.
How can you reduce shadows and glare?
Reduce shadows with light from more than one useful direction, and keep bright sources out of your normal sightline. More output helps only when it reaches the work without making you squint.
At a bench, place light above or toward the front of the work surface. A fixture behind your shoulders can turn your body into the main obstruction.
An overhead cabinet may need a separate light beneath it. Trying to fill that shaded area from the center of the ceiling often sends more light into the room without helping the bench.
For vehicle repairs, move the task light as the job moves. A useful angle for inspecting a belt may be a poor angle for reading a label or finding a dropped fastener.
Glossy benches, polished metal and screens can reflect a bright source into your eyes. Shift the light to one side or change the work angle before adding brightness.
Check the arrangement after dark with the garage in normal use. Stand at each work position, open the hood and doors, and look for dark surfaces as well as uncomfortable reflections.
How should you care for garage lights?
Keep light-emitting surfaces clean, cooling paths open and mounting hardware secure. Dust can reduce useful light, while a shifted fixture can change coverage even when every LED still operates.
Turn lights off, disconnect power where practical and let them cool before cleaning. Follow the cleaning instructions, using gentle methods that will not scratch a lens or push dirt into electrical parts.
Do not spray cleaner into sockets, connectors or housings. Avoid covering fixtures with stored materials or hanging tools from cords and mounting chains.
During routine garage cleanup, look for loose supports, pinched cables or a fixture that has moved. Replace damaged components rather than securing a worn cord with tape and continuing to use it.
For cordless lights, follow the battery's charging and storage instructions. Keep the light ready for repairs, but do not leave it where a vehicle or falling tool can damage it.
Persistent flicker, overheating or a burning smell needs attention. Switch off the affected light and have the fault resolved before returning it to service.
Which garage lighting mistakes should you avoid?
Avoid buying output before planning coverage. Most poor layouts come from choosing a fixture first and trying to make the room fit it afterward.
- Lighting only the center: put sources near the paths, bench and storage faces that need visibility.
- Using pack totals as per-light output: separate the package count from each fixture's brightness.
- Ignoring the raised door: check the layout with the door open and closed.
- Exceeding a linking limit: split the layout into approved runs instead of connecting the whole pack.
- Confusing cool color with brightness: compare lumens and color temperature separately.
- Skipping task lighting: use a movable or bench light for places blocked from the ceiling.
- Choosing controls too late: check switch access and compatibility before mounting.
- Buying every fixture at once without a layout: map the whole room first, then install in sensible stages if needed.
Keep the areas around ladders and work surfaces clear while making adjustments. A lighting upgrade should leave cords and mounting hardware as orderly as the light pattern.
How do you choose the right garage lighting plan?
Choose garage lighting by matching each fixture to a specific job and location. Make the ceiling plan first, then add task light only where that plan leaves work surfaces shaded.
For a standard-height garage with parking, shelves and a bench, choose distributed shop lights. The Hykolity pack fits that approach when you need several fixtures and can arrange separate approved linked runs.
For a tall, open workshop, consider Hyperlite high bays after checking mounting guidance and circuit load. Do not choose the pack simply because it has the highest output.
For a quick upgrade at suitable existing sockets, consider the POLARPRA panel lights. Resolve the output figures and check clearance, socket condition and electrical load before ordering.
For repairs beneath a hood or in changing locations, add the DeWalt DCL043. Treat it as the movable layer of the plan and arrange its battery power before you need it.
Write down the fixture positions, power routes and controls before buying. Then use our garage lighting guide to lumens and coverage to check whether the planned output fits each zone.
Frequently asked questions
How bright should garage lighting be?
Choose brightness for each work area, then spread the fixtures so light reaches those surfaces; parking and storage need general coverage; benches and close repairs need added task light. Estimate total lumens from the garage area, but account for ceiling height, dark finishes, shelves and shadows before deciding how many fixtures to buy.
Are LED shop lights good for a garage?
LED shop lights suit many garages because you can distribute them along parking bays, benches and storage aisles. Choose a mounting method that fits your ceiling, then check output, cord reach and linking limits; for a low or standard ceiling, several well-placed fixtures often give more useful coverage than one central light.
Should garage lights be 5000K or 6500K?
Choose 5000K for a daylight appearance with less blue character than 6500K; choose 6500K if you prefer a cooler look, but do not confuse that appearance with higher brightness. Keep nearby fixtures consistent, and consider color rendering separately if you compare paint, wood stains or wire colors.
Do high bay lights work in a home garage?
High bay lights suit tall, open garages where the beam has room to spread before reaching the work area; they are usually a poor first choice for low ceilings with nearby shelves and door tracks. Follow the fixture's mounting guidance and plan coverage at bench height as well as floor level.
Can I install garage lights myself?
You can often mount a plug-in light or replace a bulb yourself when the existing support, socket and outlet are suitable. Follow the instructions, keep cords clear of moving parts and use a stable ladder; hire a qualified electrician for hardwiring, new outlets, damaged sockets or circuit changes.