How to Wire and Link LED Shop Lights Safely
To wire LED shop lights safely, match the fixture to its approved power connection and disconnect power before installation. Use plug-in models with suitable outlets, and have a licensed electrician handle building wiring, including verifying that the circuit is de-energized.
On this page (11 sections)
- How do you choose how to wire LED shop lights?
- How do you prepare before connecting shop lights?
- How do you install plug-in LED shop lights?
- How do you connect linkable shop lights?
- Can you hardwire an LED shop light yourself?
- How much light should you plan before wiring?
- What mistakes should you avoid when wiring shop lights?
- How do mounting and placement affect safety?
- Do LED shop lights need a ballast?
- How should you care for installed shop lights?
- Which wiring setup should you choose?
To wire LED shop lights safely, choose the correct power connection, disconnect power, and follow the fixture instructions. Plug-in lights use a suitable outlet; hardwired lights connect to building wiring and usually call for a licensed electrician.
Linking is a separate feature: it connects compatible fixtures together but doesn't make every light plug-in. Decide how the first fixture receives power before planning the rest of the run.
How do you choose how to wire LED shop lights?
Choose plug-in fixtures for an existing suitable outlet and hardwired fixtures for a permanent direct connection. Match the light to your electrical setup before comparing brightness or buying a multipack.
A ceiling outlet may make plug-in installation straightforward, but check whether it is switched and reachable by the original cord. A nearby garage-door opener outlet isn't automatically the right place to power a whole lighting run.
Hardwired fixtures suit an existing ceiling connection or a planned installation with a wall switch. Include any new wiring, boxes, or switch work in the installation plan.
Start with the complete garage and workshop lighting guide for the room layout. Then work out how many shop lights you need before choosing pack sizes.
How do you prepare before connecting shop lights?
Prepare by checking the fixture instructions, power source, mounting points, and cable route before drilling or making connections. For building wiring, a qualified person must isolate the circuit and verify that it is de-energized with appropriate equipment.
A wall switch being off doesn't prove the wiring is safe to touch. Keep others from restoring power while work is underway, and use a stable ladder in a dry work area.
Measure around garage-door tracks, shelving, and overhead storage. Leave access to connectors and any controls so routine use doesn't require moving equipment or pulling on cables.
Confirm that the light suits the location, including moisture and temperature conditions. The 3 options below are indoor fixtures; don't assume a garage fixture is suitable for rain or washdown areas.
How do you install plug-in LED shop lights?
Mount a plug-in light while it is unplugged, secure its cord, and connect it to a suitable outlet after installation checks. Use the fixture's original power connection and approved mounting method.
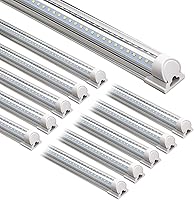
The Sunco 4FT Plug-In Linkable LED Shop Lights 10-Pack suits buyers lighting several indoor work or storage areas from existing outlets. It includes mounting hardware and hanging chains, giving you ceiling-mount and suspended options.
The pack size is not the link limit. Plan separate powered groups if you want to use all 10 fixtures, and have the circuit load checked rather than putting the whole pack into one chain.
Choose Sunco when its 5000K light and corded setup fit your room. Skip it if you only need one fixture or want a direct-wire installation without visible power cords.
Route cords away from sharp edges, hot surfaces, moving doors, and places where they could be pinched. Don't use an extension cord as a substitute for installing a needed outlet.
How do you connect linkable shop lights?
Connect linkable lights with the exact connectors and layout the manufacturer permits. Disconnect power before adding, removing, or rearranging fixtures, and never force a connector that doesn't fit.
The Hyperlite 4FT Linkable LED Wraparound suits longer rows and workspaces where you want a choice of output. Its selectable 40W, 50W, and 60W settings correspond to 4400, 5500, and 6600 lumens.
Its 5000K light suits buyers who prefer a daylight-like appearance for workshop tasks. Skip it if you want warmer-looking light or need a confirmed plug-and-play setup without checking the initial power connection.
Confirm how the first fixture receives power before ordering. Linking ports describe how lights connect to each other; they don't mean a wall-outlet cord is included.
Measure the route between connection points, allowing for turns and secure cable support. A cable's total length isn't the same as the usable gap between fixtures.
Set adjustable power only as the instructions allow, with power disconnected when required. Don't assume a wattage selector provides wall-dimmer compatibility.
Can you hardwire an LED shop light yourself?
Hardwire a fixture only if you are qualified and locally permitted to work on building wiring. For most homeowners, hiring a licensed electrician is the right choice.
The Hykolity 4FT Hardwired LED Wraparound suits a permanent ceiling installation where a direct connection is already available or planned. It has no plug, and Hykolity recommends professional installation.
Its 40W output provides 4400 lumens at 4000K, a less blue-looking choice than the other fixtures here. The prismatic acrylic lens wraps around the light source, and the housing measures 46.06 x 5.7 x 1.91 in.
Choose it for a fixed garage, basement, or utility-room installation. Skip it if you rent, expect to move the lights often, or want to connect directly to an outlet.
For a closer comparison of installation needs, read plug-in vs. hardwired LED shop lights.
What should an electrician check when wiring LED shop lights?
The electrician should confirm supply voltage, grounding, circuit capacity, and suitable connection enclosures before connecting the fixture. Existing wiring and switches must also suit the new light.
Wire colors alone don't guarantee conductor function, especially in altered wiring. Connections need the specified connectors, proper cable entry protection, and accessible enclosures as required for the installation.
Mention any dimmer, sensor, or smart switch you want to keep. Don't assume an LED fixture will work with an existing control unless its instructions confirm compatibility.
How much light should you plan before wiring?
Plan fixture count, spacing, and task coverage together rather than choosing only by the highest lumen figure. One bright light in the center can leave shadows beside shelves or behind you at a bench.
Place lighting so your body doesn't block the main light from reaching your work. Separate task lighting may help at a bench even when the rest of the garage is bright enough for parking.
Use how many lumens you need in a garage to plan total output. Then compare garage lighting color temperatures before mixing fixtures with different light colors.
A link limit also differs from a circuit-load limit. The circuit may serve tools and other equipment, so an electrician should consider those loads alongside the lights.
What mistakes should you avoid when wiring shop lights?
Avoid energized work, unapproved conversions, and overloaded connections. A fixture that lights up can still have an unsafe installation.
- Don't cut off a plug to turn a corded fixture into a hardwired one.
- Don't add a cord to a direct-wire fixture unless its instructions allow it.
- Don't mix linking cables across brands or models without explicit compatibility.
- Don't exceed the allowed number of linked fixtures.
- Don't conceal flexible power cords inside walls or ceilings.
- Don't leave cables stretched tight or supporting a fixture's weight.
Stop using the lights if you notice a burning odor, visible damage, a hot outlet, or repeated breaker trips. Disconnect power safely and have the cause checked before using the setup again.
Don't keep resetting a breaker to finish a task. A larger breaker is not a remedy for an overloaded or faulty circuit.
How do mounting and placement affect safety?
Secure each fixture to suitable supports before connecting power, using the manufacturer's mounting method. Linking cables and power cords must never carry the fixture's weight.
Keep lights and cables clear of the full travel of garage doors and tall stored items. Check for hidden wiring and pipes before drilling into walls or ceilings.
The guide to hanging LED shop lights covers mounting choices. Use the LED shop light spacing guide to plan coverage before fixing the positions.
Do LED shop lights need a ballast?
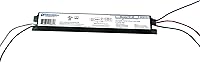
Complete LED shop light fixtures generally don't use a fluorescent ballast. Replacing a whole fixture differs from fitting LED tubes into an existing fluorescent housing.
Don't route power to a new fixture through an old ballast unless the fixture instructions specifically require that arrangement. Have an electrician identify unfamiliar wiring before replacement.
Read whether LED shop lights need a ballast for the fixture-versus-tube distinction. The guide to replacing fluorescent shop lights with LED covers the broader replacement choices.
How should you care for installed shop lights?
Keep lenses and housings clean with power disconnected, following the fixture's cleaning instructions. Dust buildup can reduce useful light, especially above woodworking benches and storage shelves.
Use a soft cloth and avoid spraying cleaner into connectors or electrical openings. Let fixtures cool before cleaning, and don't loosen mounting hardware to reach a dirty section.
Check accessible cords, links, and supports during cleaning. If a fixture starts flickering, loses output, or shows heat damage, stop using it until the cause is identified.
Which wiring setup should you choose?
Choose Sunco for outlet-powered groups, Hykolity for a permanent direct-wire fixture, and Hyperlite for a longer linked row with selectable output. Confirm Hyperlite's initial power connection before committing to the layout.
When deciding how to wire LED shop lights, settle the power source first, then the fixture count and cable routes. Before restoring power, check supports and cords, and have hardwired connections inspected by the qualified installer.
Use the shop light guide to compare options once your connection method and layout are clear.
Frequently asked questions
Can LED shop lights be linked together?
Yes, if the fixtures are designed for linking and you use their approved connectors; match the exact model and follow its connection instructions, since plugs that look alike may not be compatible. Disconnect power before changing links, and stay within both the manufacturer's link limit and the circuit's capacity.
Can I hardwire a plug-in LED shop light?
Only convert a plug-in shop light if its manufacturer explicitly permits that installation and gives instructions for it. Otherwise, keep the original cord and plug or choose a direct-wire fixture; cutting off a plug does not make a fixture suitable for a permanent connection to building wiring.
Do I need an electrician to install LED shop lights?
Use a licensed electrician for new circuits, outlets, switches, and hardwired connections beyond your qualifications or local permissions. Mounting a plug-in light can be simpler when a suitable outlet already exists; you still need secure supports, a protected cord route, and a fixture suited to the installation location.
How many LED shop lights can I connect together?
Follow the limit for your exact model, rather than using one number for all shop lights. The Sunco option here supports up to 4 linked fixtures, while Hyperlite supports up to 8; those limits do not replace a circuit-load check, especially when other equipment uses the same circuit.